Getting Started
This walkthrough takes you from launch to your first result in under a minute.
1. Add a connection
Click ➕ in the Connections panel (top-left) and fill in:
| Field | Notes |
|---|---|
| Name | A label, e.g. local dev |
| Host / Port | Defaults to 127.0.0.1:3307 (ElyraSQL's default) |
| User / Password | Password is stored in the OS keychain |
| Default database | Optional; ElyraSQL's default is elyra |
| Environment | Dev / Staging / Prod — drives the accent colour and safety rails |
| Read-only | Refuses writes on this connection |
| Require TLS | Enforce an encrypted connection |
Click Test to verify, then Connect.
Free edition
The Free edition connects to local databases in read-only mode. Remote connections and editing require Pro or Premium.
2. Explore the schema
The left navigator shows the databases and their tables and views. Pick a database from the dropdown, then filter and click objects. Right-click an object for Open, Info & DDL, Copy name/SELECT, and (Premium) Design.
3. Run a query
A query tab opens automatically. Type SQL and press ⌘/Ctrl + Enter (or click Run). Results appear in the grid below, with per-statement timing and row counts.
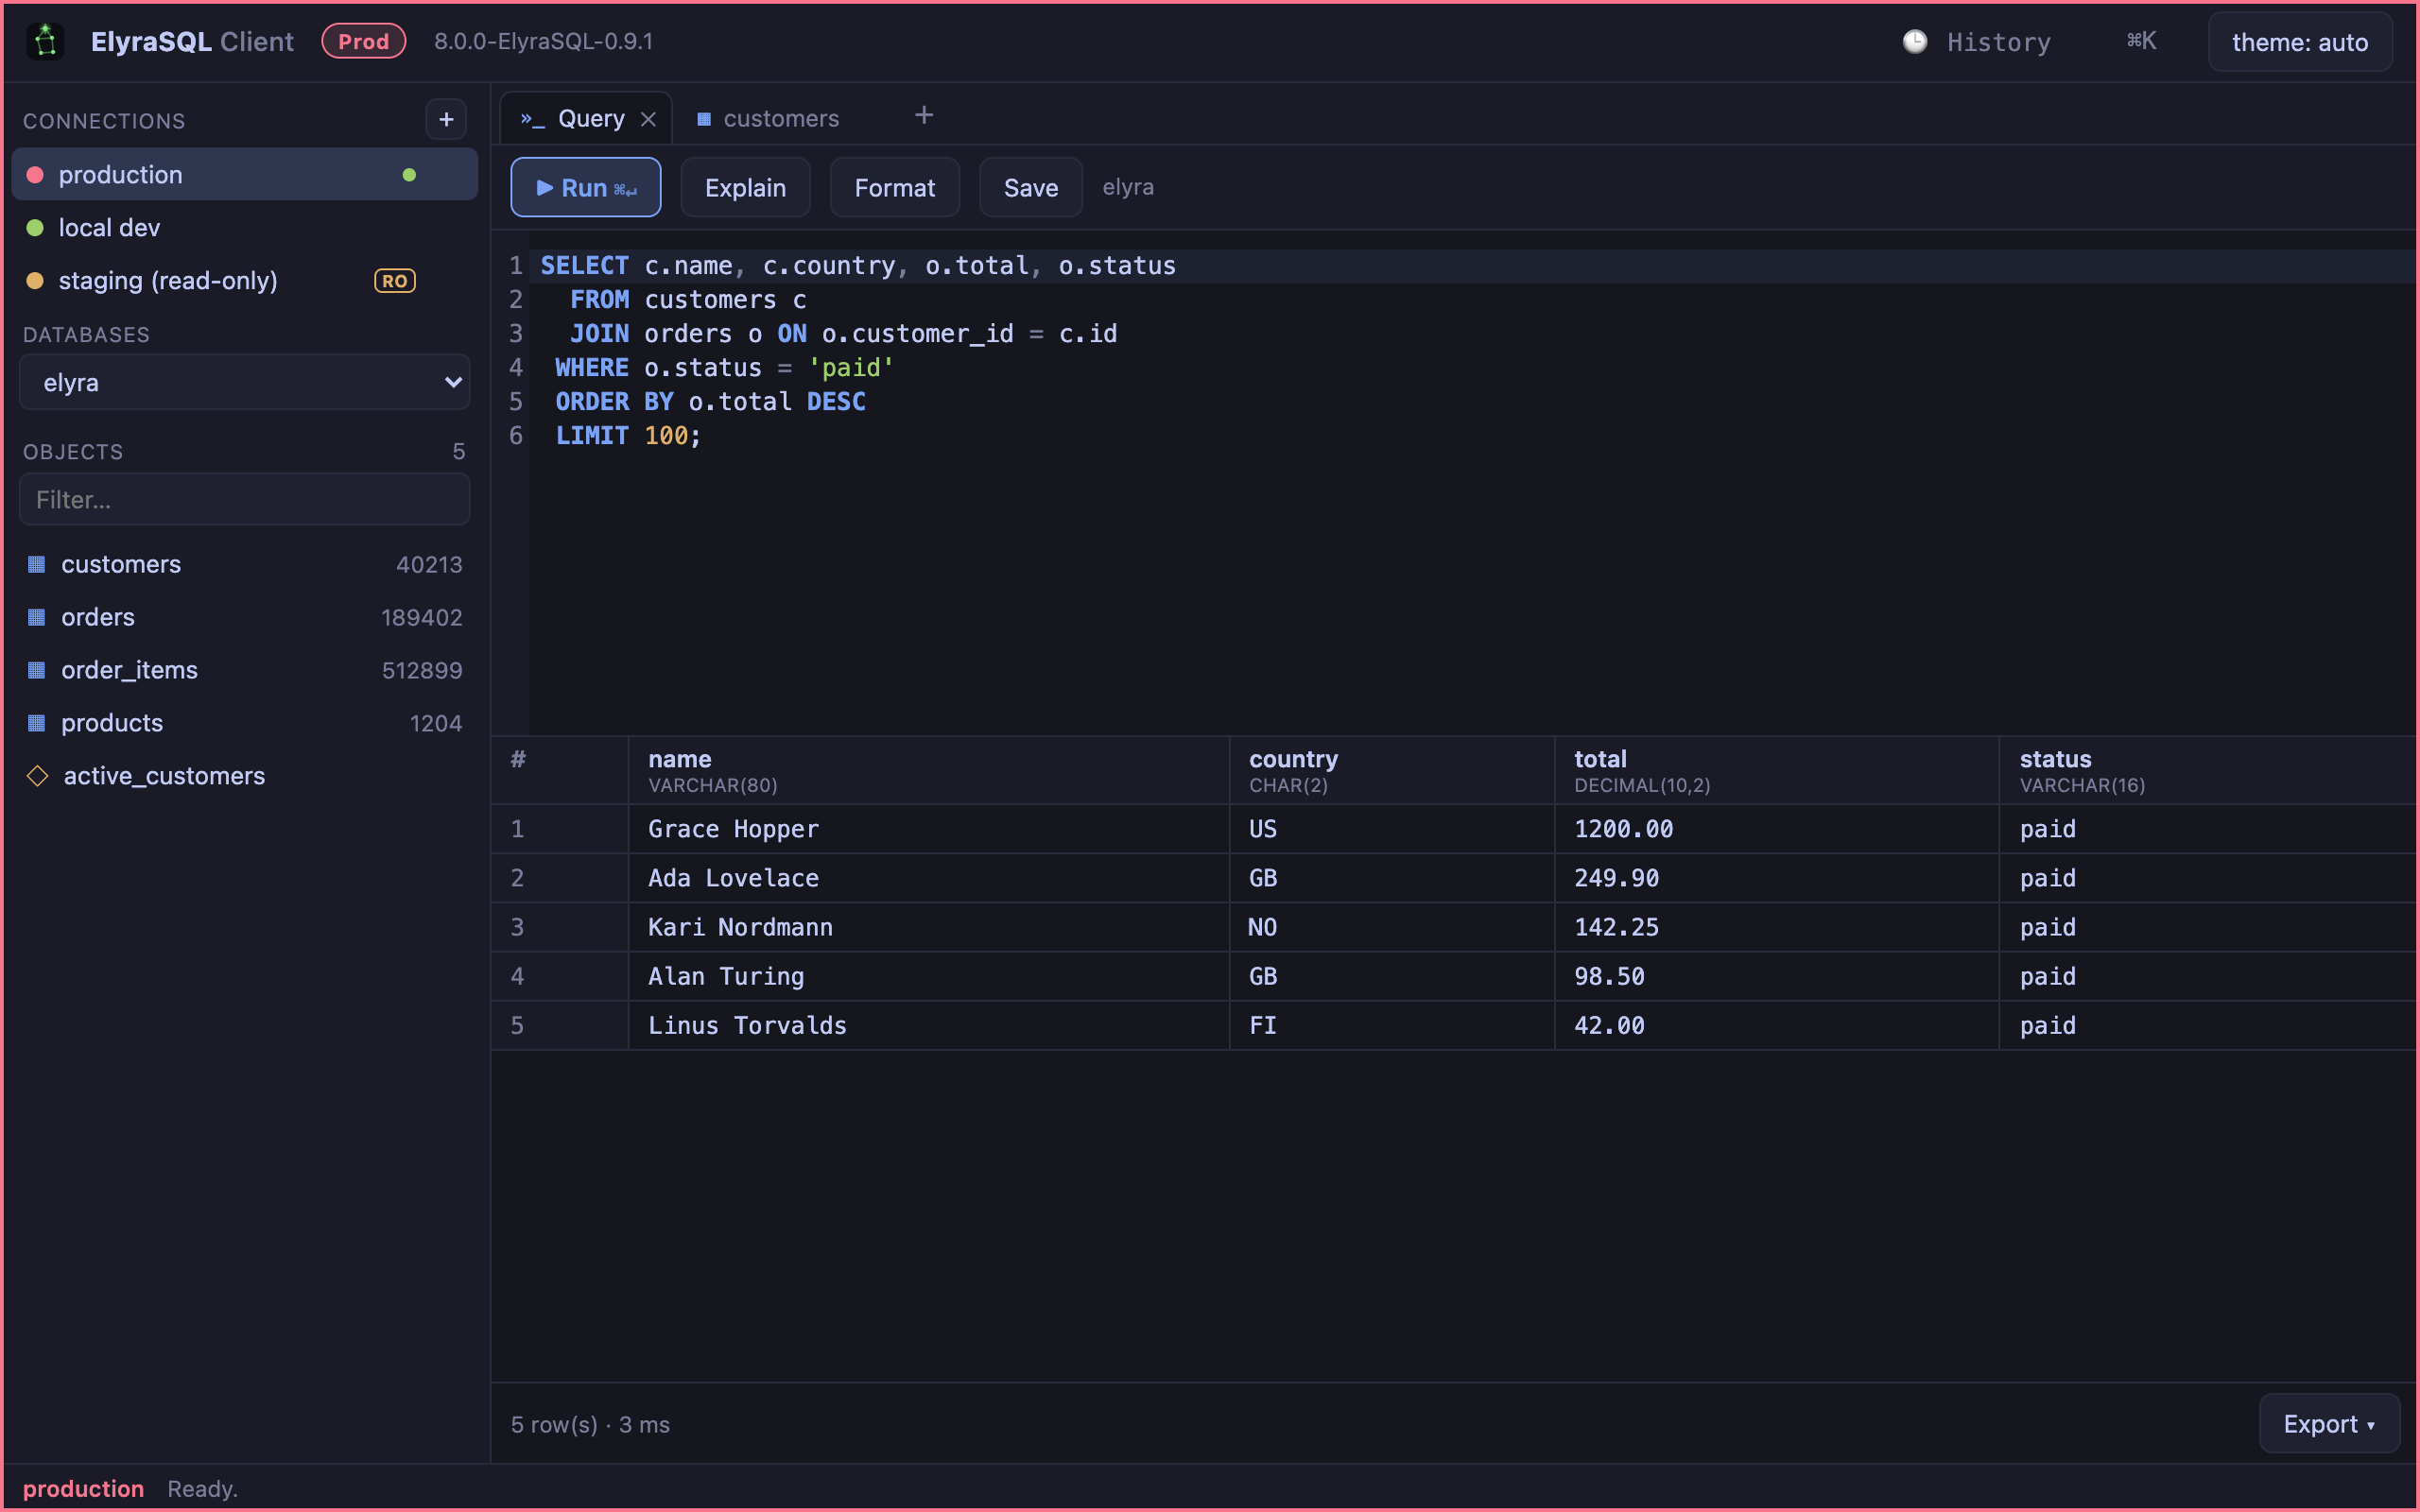
Use Format to prettify, Explain for a query plan, and Save to keep a query for later.
4. Browse and edit a table
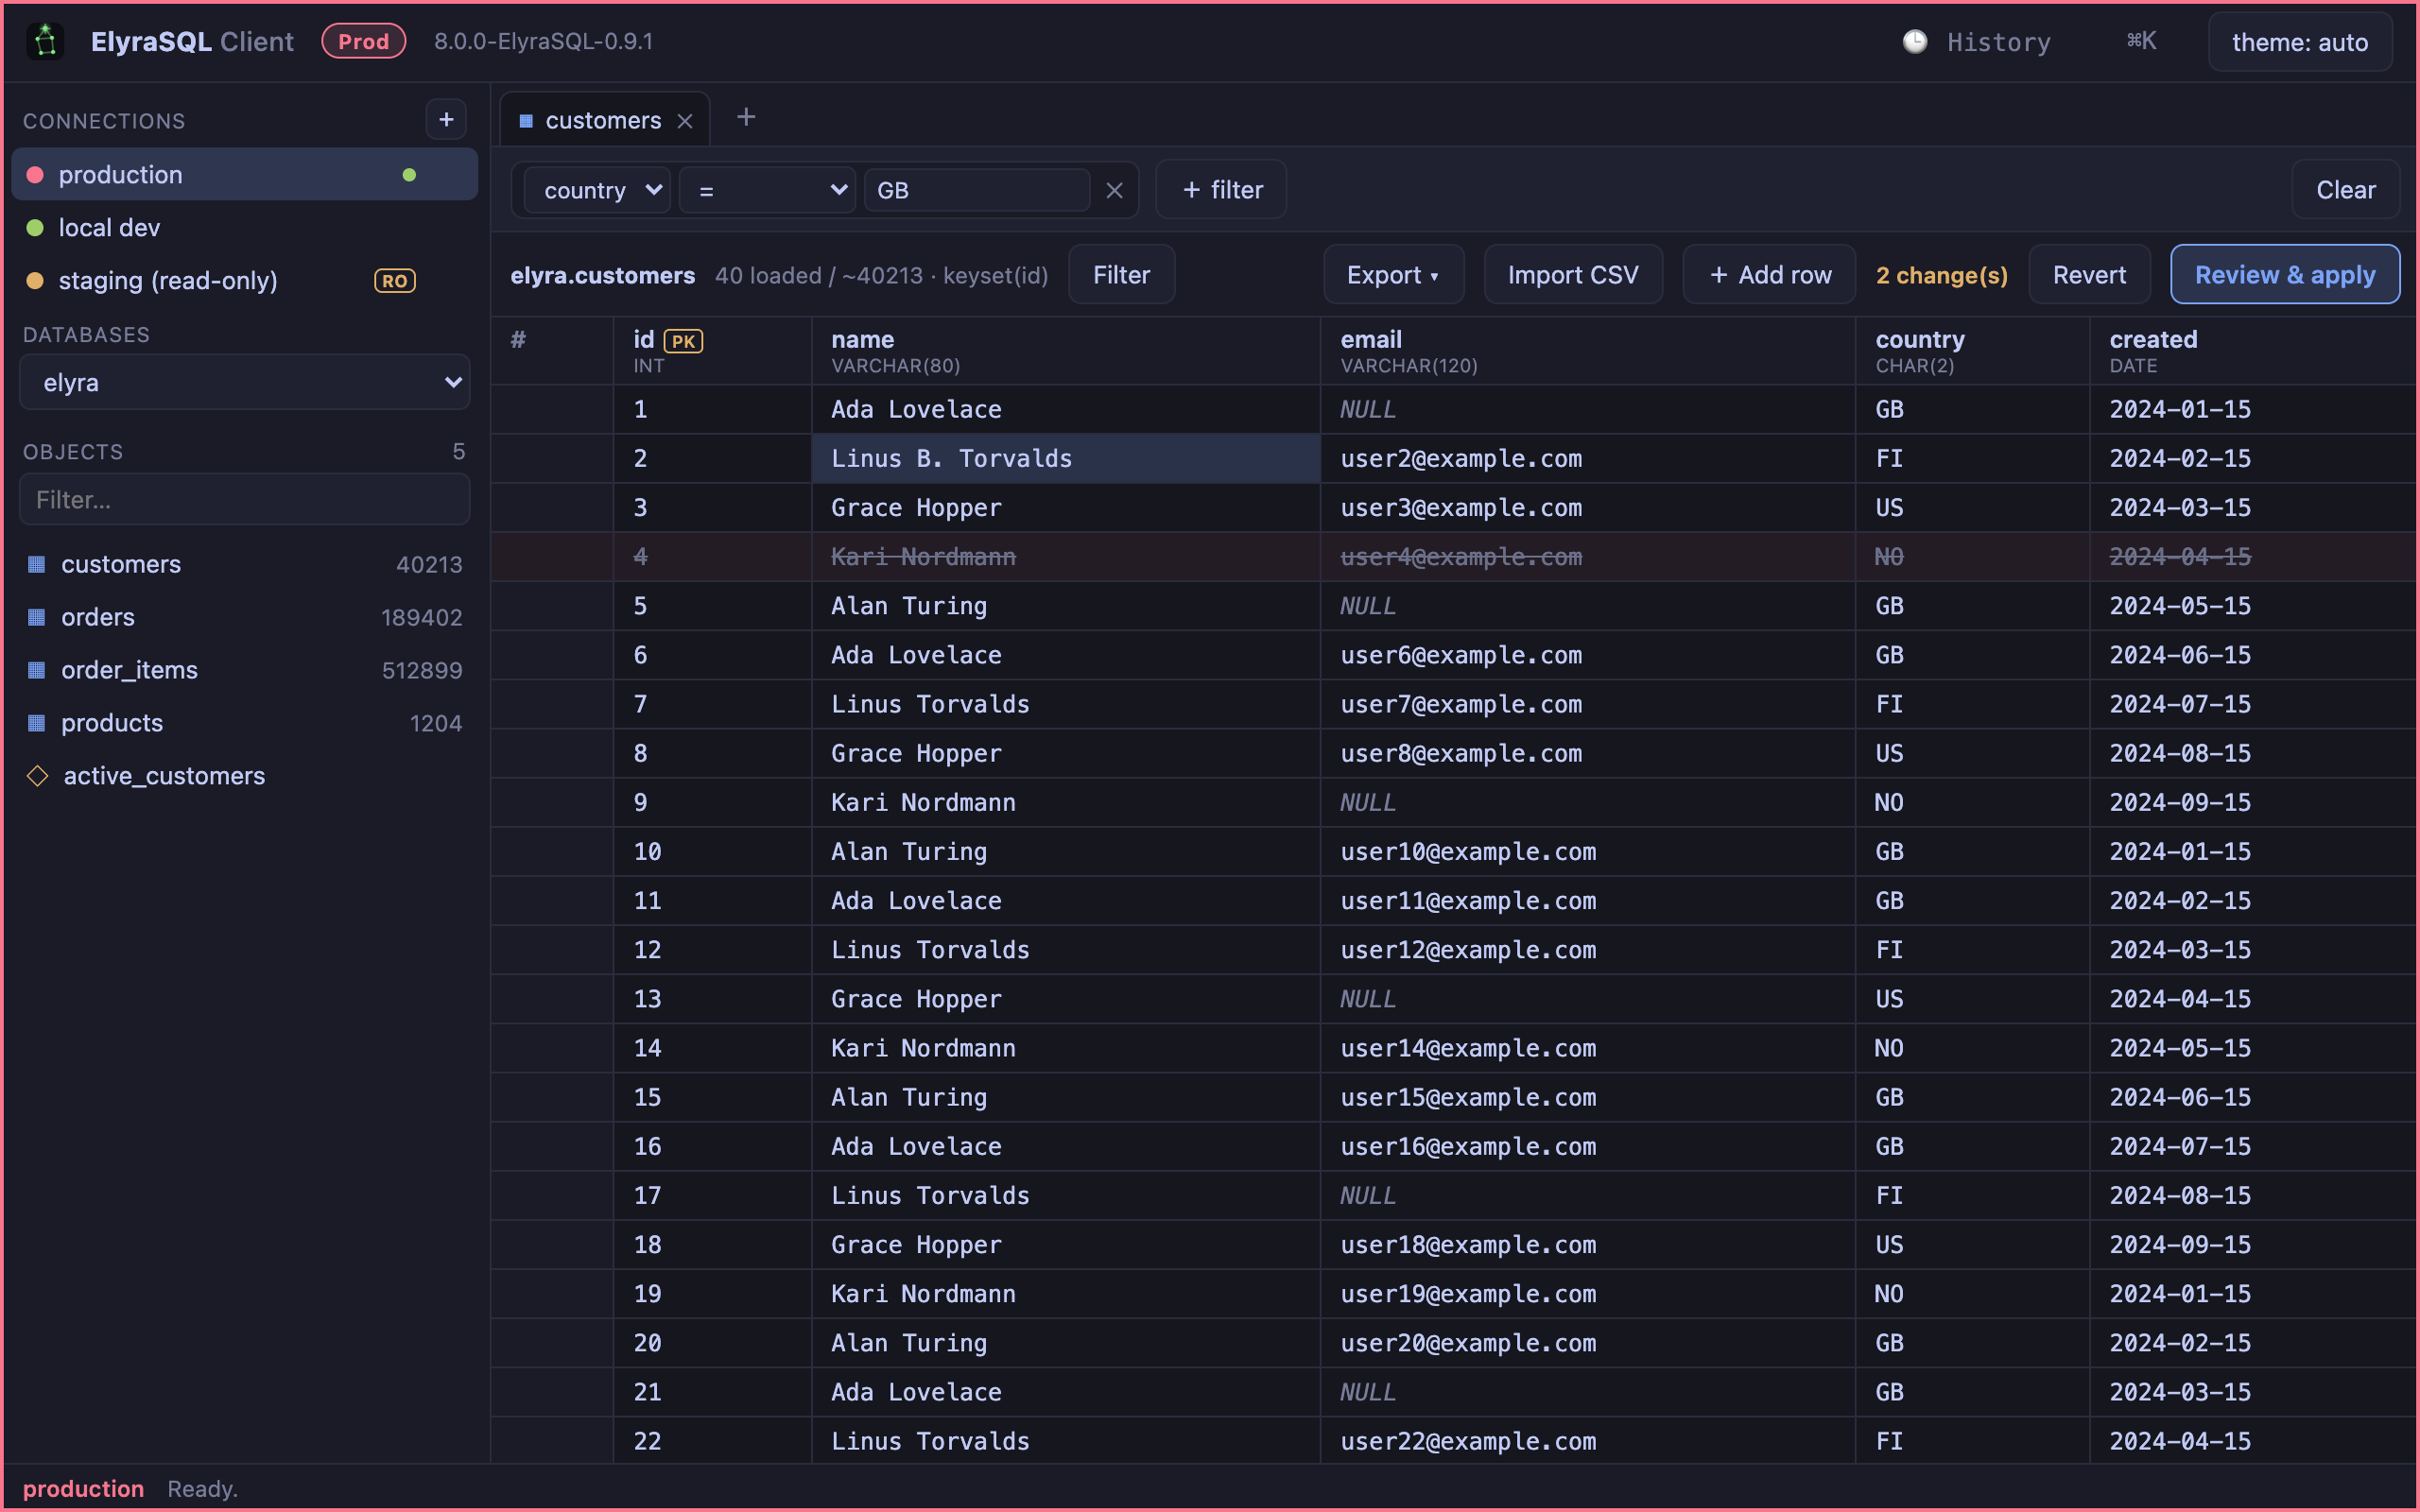
Double-click a table (or use the command palette) to open it in the virtualized, server-paged grid. On Pro/Premium you can filter, edit cells inline, add and delete rows — all buffered and shown as SQL before you commit.
Keyboard-first
Press ⌘/Ctrl + K for the command palette — jump to any table, switch connection or database, open the Query Builder, and more. See Keyboard & Command Palette.